SKILLS Tension & Gauge
I’m so sorry, but I feel like it’s time for us to have ‘the talk’ …. about tension and gauge. Seasoned knitters can probably skip to the end, but over the last half year there have been a lot of new knitters coming into the fold, and they could use a little support.
What is Tension and/or Gauge?
Tension or gauge is the way knitting and crochet is measured mathematically. It represents the relationship between the size of your needles and the thickness of your yarn. It is math, and we check it to try and figure out the size and proportions of the garment we want to make. If your needles are too small in size for your yarn your tension will be too tight, the fabric will be too tight and rug-like, and the garment will come out smaller. Similarly, if your needles are too large in size for your yarn, your tension will be too loose, the textile will be too loose, open and floppy, and the size will be too large.
Why Can’t You Skip over it or Estimate it?
Primarily, tension is numbers, math, as in the bones and sinews of the universe, the laws of nature. You can’t cheat nature … well, you can try, but you will *not* like the results. An accurate tension swatch gives you the information you need to make an informed decision about how to proceed with your sweater. If your number of stitches is smaller than the one given in the pattern, your sweater will be too big, and if it is larger than theirs it will come out too small. Major bummer.
Secondarily, tension varies from person to person, everyone holds their yarn a little bit differently, so even if you are using the same yarn and needles as someone else, your work may not come out at the same tension. Furthermore, peoples’ tension can change from time to time, depending on their emotional and psychological state. Unsurprisingly, when you’re in a tense place you knit tighter, when you’re relaxed you knit looser. For example, my tension has always been fairly consistent, but after I took up meditation my tension loosened up. Another good example are my “Haley Special” sweaters – over the years I’ve made 6 iterations of the same sweater using the same yarn, pattern and needles and I’ve noticed that the tension on each is a little bit different.
Thirdly, if you want to get really niggly, the tension on balls of yarn can vary from colour to colour and dye lot to dye lot. Some times the milling process changes and the yarn is slightly different. The tension on an older ball of yarn may not be exactly the same as a more current version of itself. This doesn’t happen very often, but I’ve seen it happen.
How NOT to Measure Tension
Most people start off knitting their tension swatches incorrectly, but IT’S NOT YOUR FAULT, it’s the system! This is because knitting patterns are kind of like cooking recipes – they’re a set of directions and they assume that you already know how to do the techniques they are directing you to do. Much like a cooking recipe doesn’t teach you how to crack an egg, a knitting pattern will most likely not explain how to knit a tension swatch.
Most people learn about tension the hard way … on their first sweater. They find a pattern and the ‘yarn people’ tell them to knit a tension swatch before casting on. The pattern says the tension is “18 sts & 24 rows = 4″/10cm” in stocking stitch, and so they cast on 18 stitches and knit away. Maybe the swatch comes out 4″, and maybe it doesn’t. (I usually hear about it when it doesn’t, and that generally leads to a mini-intervention.) Unfortunately, this is NOT the correct way to measure your tension, because it doesn’t give you the accurate information you need to make sure your garment will fit.
How to Measure Tension (Properly)
Swatching is an expedition in information gathering, and you need to make sure that your recon is accurate, otherwise it isn’t going to help you.
- You need to make a larger piece of fabric, ideally something around 6″ x 6″. To find this number take the suggested tension of the yarn ball-band (ex. 18 sts = 4″) and multiply it by 1.5. If the yarn label gives you a number in one inch, multiply that by 6.
- Work your swatch in the stitch pattern described in the pattern’s gauge information. If a pattern calls for a K2P2 rib working your swatch in stocking stitch won’t give you the information you are looking for.
- Wash your swatch and dry it in the way you will launder the finished garment.
- Measure the number of stitches and rows over 4 inches/10cm on the INSIDE of the swatch. The stitch tension on the edges is wonky, try to avoid them.
Other Useful Things to Know
- Try to swatch with the needles you expect to be knitting with. Different materials and needle lengths can result in different tensions. For example, I find I knit tighter on metal needles than I do on wood. Also, any time I use 16″ circular needles or shorter my tension tightens up, and it is not the same as when I knit on the same size, longer circumference needles.
- If you are swatching for a garment made in the round you need to swatch in the round. This is because your knit and your purl stitches don’t have exactly the same tension. A demo of how to swatch in the round is HERE, the technique starts at 2:56.
- Swatches are a good source of extra yarn if you need to mend your finished sweater. I often label mine, pack them up in a little ziplock bag and throw it in my sewing basket just in case.
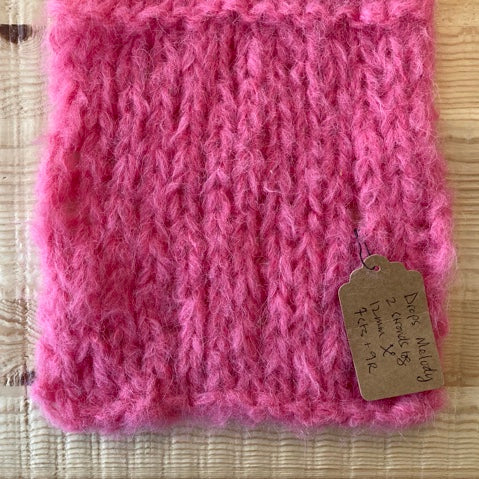
- I label my swatches with the pertinent information, because I will inevitably immediately forget what it is, the size needle I used, and the tension measurement. Sometimes I also take a photo and upload the details into Ravelry for potential later use (because I’ll probably misplace my swatch too).
Swatch Demo
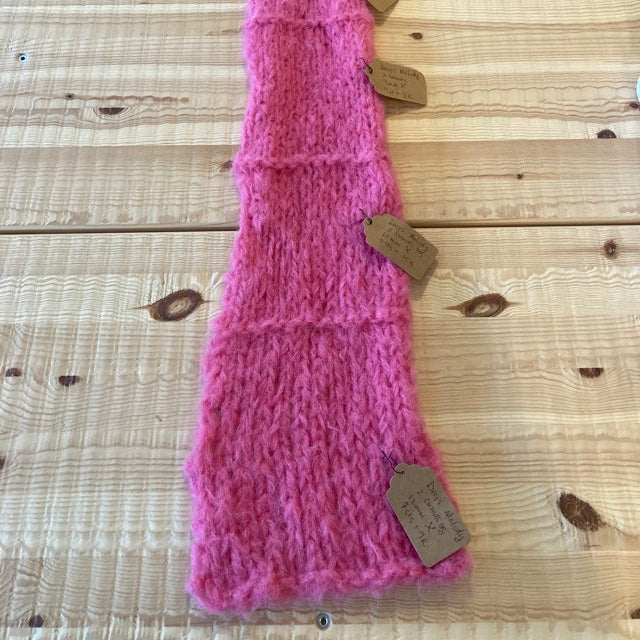
Above is some swatching I recently completed. I wanted to know how a new yarn, Drops Melody, would knit up on different sized needles and holding multiple strands together, so I swatched it. Whenever I changed needle size I worked a purl row to differentiate the two sections.
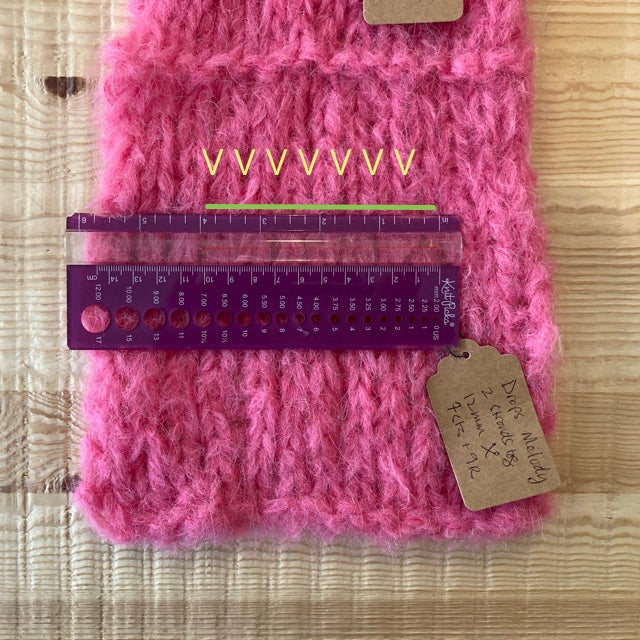
Here’s a section of my swatch being measured. The ruler is in the centre of the piece, the green line represents 4 inches, and I tired to highlight the stitches with the yellow “V”.
Share this item: